
Bought a Engel MT35 fridge. Big heavy beast. Start thinking more and more about the interior. # Just uploaded tons of inspiration … → 30/06/2010
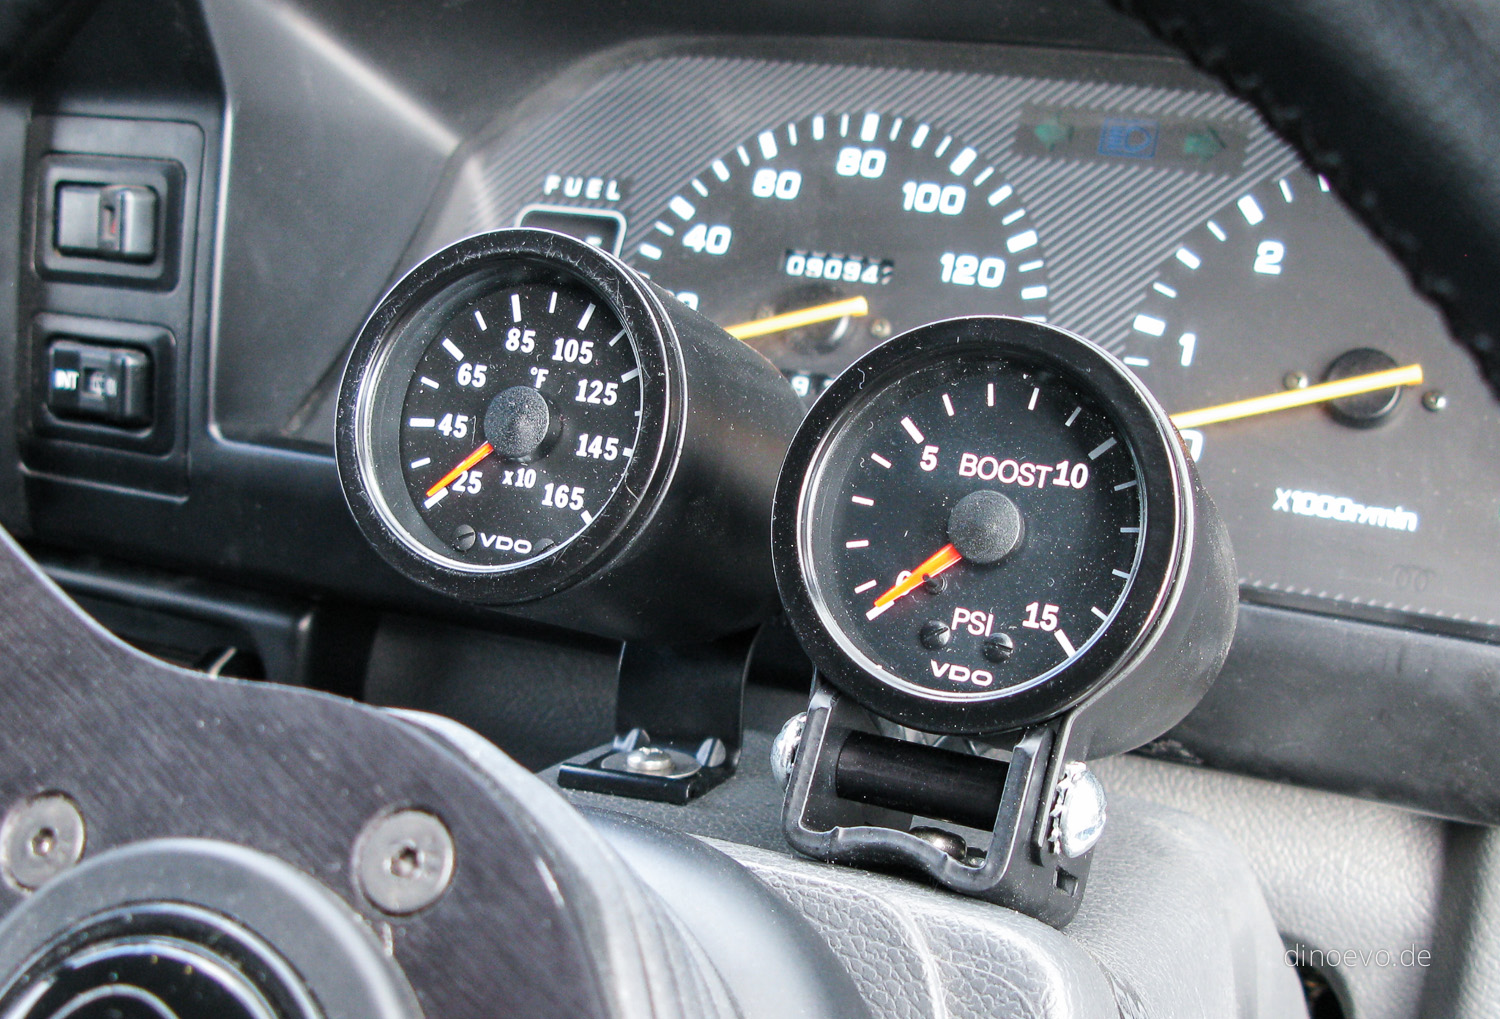
Pyrometer & Boost Gauge
To know a little bit better what’s going on inside the engine I installed a pyrometer (for the exhaust gas temperature) and …
Pressure Valve Blocker
One temporarily downside of the snorkel was the constantly releasing of the pressure valve under load. That had to be fixed. I …
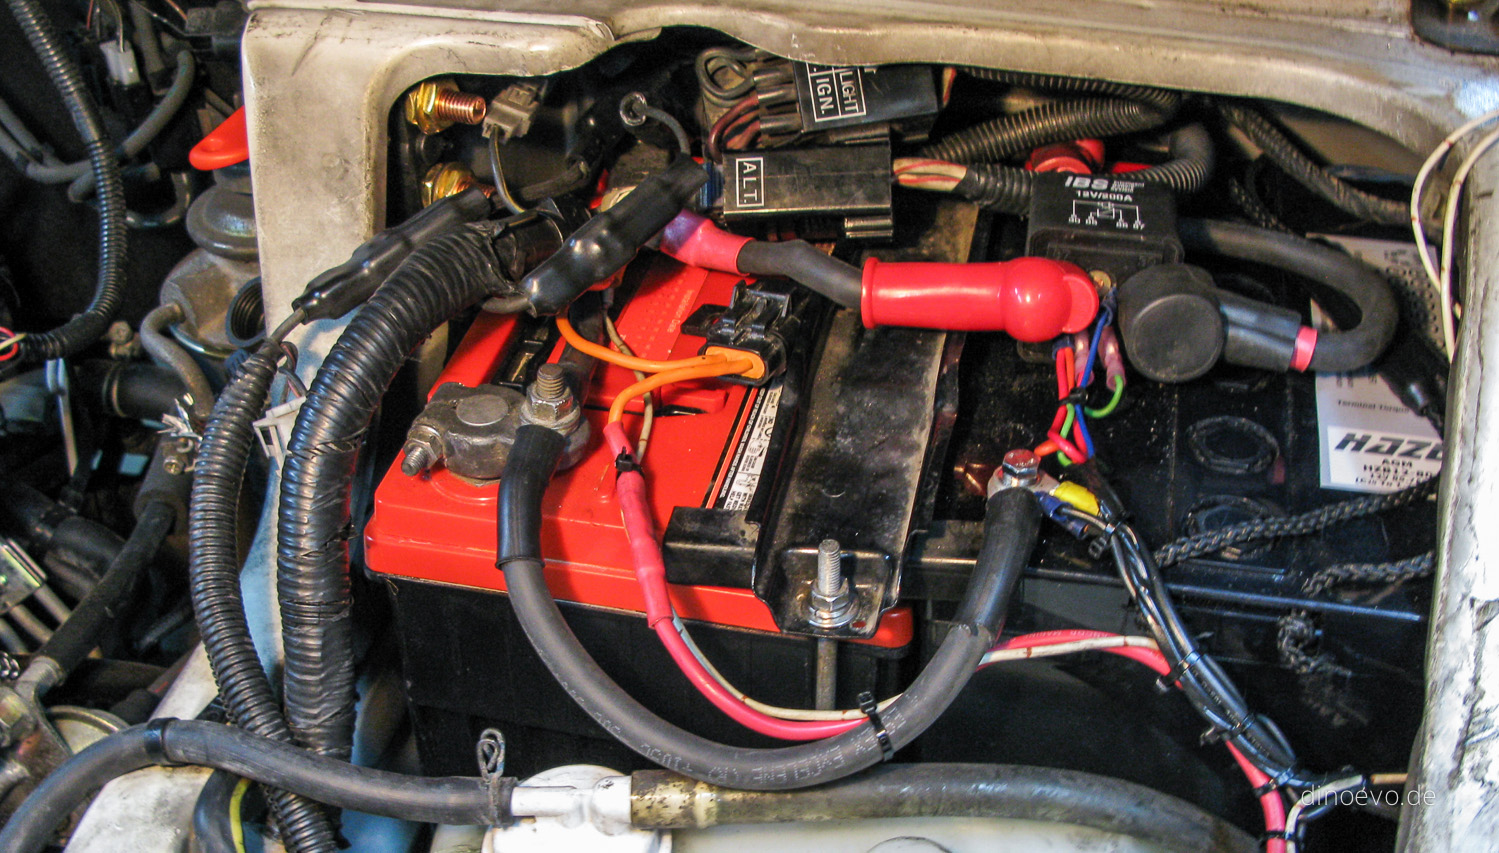
Dual Battery System
First I want to say a big thank you to Jay for the time he spent to install our new dual battery …

Engel MT35 Fridge
One of the first interior appliance we bought recently is a proper compressor fridge. After years of ice- and 12v-coolers we finally …
Abenteuer & Allrad Germany
A few weeks went by without any work on our van as we went to Germany to Europe’s largest 4×4 and camping …